Introduction
Hey there, XR enthusiasts! 🎉 We at Black Whale Studio are thrilled to share our experience with the newly shipped Lynx-R1, a groundbreaking device in the realm of Mixed Reality. Let’s dive into its features and how to harness its potential in Unity, especially its color-passthrough cameras and open platform. 🕶️
Getting Started with Lynx-R1
- Device Overview: The Lynx-R1 stands out with its open platform, down to the hardware level, excluding the Qualcomm XR2 Generation 1 chips. It’s a breath of fresh air for developers who crave unrestricted access to sensor data. 🌐
- Technical Specs: For a detailed understanding, don’t miss the Lynx-R1 technical specifications page. It’s a treasure trove of information! 🔍
- Compatibility Highlights: The device uses Ultra-leap sensors for hand-tracking and shares similarities with the Meta Quest 2’s XR2 chip. It’s Android-based and supports Unity and OpenXR right out of the box, making it a versatile tool for developers. 🤖
Setting Up Your Unity Project
- Creating a New Project: Start with Unity version 2021.3 or later, as recommended by Lynx documentation. 🛠️
- Downloading the SDK: Head over to the Lynx Portal, create a profile, and download the “Unity 3D SDK”. This SDK is your gateway to developing with the Lynx-R1. 📦
- SDK Components: The SDK includes a core package for building applications, a modules package (mainly for hand-tracking), and a samples package showcasing the features. Import all these to get the full Lynx experience. 📚
- Additional Package Requirements: Install OpenXR and the XR Interaction Toolkit packages, along with XR Hands and Ultra-leap hand-tracking packages, to fully utilize the Lynx SDK’s capabilities. 📈
Configuring Your Project
- Adjusting Project Settings: Use the Lynx menu to configure project settings and ensure OpenXR and the Lynx focus group are enabled. 🎚️
- Setting Up XR Origin: Remove the main camera and create a new “XR Origin” for a fresh start in your XR development journey. 🎥
Implementing Hand-Tracking and AR/VR Toggle
- Adding Hand-Tracking: Easily integrate hand-tracking into your scene via the Lynx menu or by right-clicking in the hierarchy. Choose your desired XR-interactors and add them to your XR Rig. 👐
- Creating a Custom Menu: Unlike Meta devices, Lynx requires a custom menu for app navigation. Fortunately, Lynx provides a ready-to-use menu template, easily added to your project. 📲
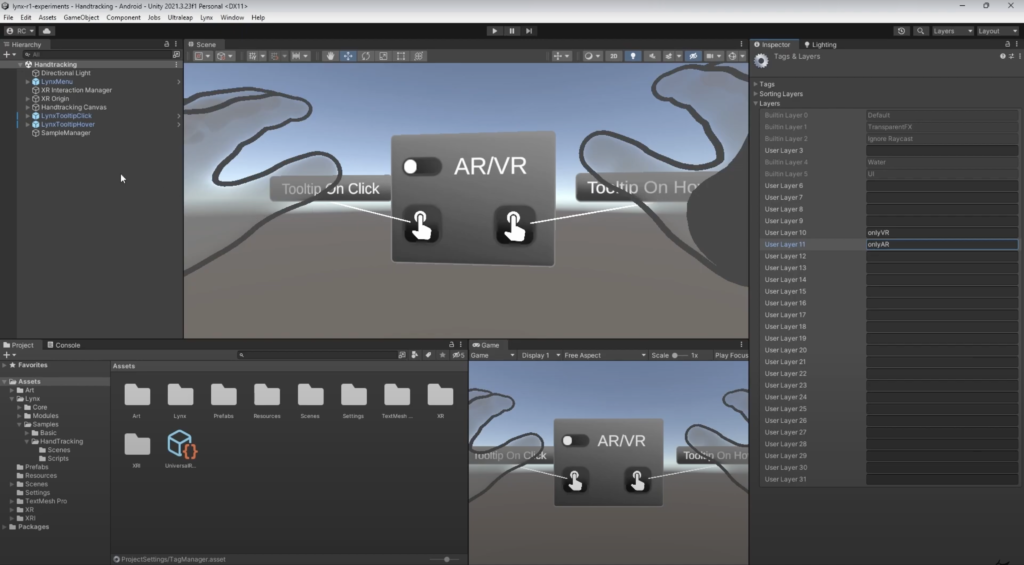
- Exploring VR and AR Modes: Lynx’s sample scene offers a seamless toggle between VR and AR modes. Customize your experience in the OpenXR settings and experiment with different layers for VR and AR visibility. 🌌
Coding and Testing
- Programming the Modes: Use simple Lynx API commands to check and set your device’s mode (AR or VR). Tap into the “on AR VR changed” event for dynamic mode switching. 💻
- Testing Your App: Download the “Demo Manager” from Lynx, create a build of your app, and test it directly on your Lynx device. Ensure you’ve enabled “Developer Mode” and “File Transfer” on your headset. 🎮
Conclusion
The Lynx-R1 opens up a world of possibilities for XR development, offering unparalleled access to sensor data and easy integration with Unity. Dive into the sample scenes for inspiration and join our XR developer community on Discord to share your creations and ideas. 🌟
Join Our Community
Have questions or want to discuss XR development? Join our XR-developer community on Discord and engage with peers in this exciting field 💬.
Support Black Whale🐋
If you find our content helpful, consider supporting us on Patreon. Your contributions enable us to continue creating free, high-quality educational material 👍.
Thank you for following this tutorial. Stay tuned for more in-depth and insightful content in the realm of XR development! 🌐
Did this article help you out? Consider supporting me on Patreon or simply subscribe to my YouTube channel!